When you turn on the PC via the power button on the case, the computer does not directly access the operating system and hard drive to run. What it does in this case is start an execution process in which the PC's BIOS is first executed, and after which, it follows the instructions to turn on the PC, and the same after turning it off. Sometimes you have made BIOS settings and your PC is worse, and that is why we explain here what you should do to reset the BIOS of your computer.
Table of Contents
What does BIOS mean?
BIOS stands for “Basic Input Output System”, which in Spanish means “Basic Input and Output System”.
What is a BIOS?
A BIOS is a small firmware stored on a non-volatile memory device, installed on the computer's motherboard. The ROM that contains the BIOS is not deleted when the PC is turned off, therefore it is available when it is turned on again. As soon as any 64 or 86-bit PC is turned on, its BIOS boots automatically. If you wonder when you've installed a BIOS, you've never had to install it, since it's built into the computer's hardware. You may have downloaded new driver versions from time to time to get new features and security improvements, and better compatibility with new devices that weren't available when the motherboard you're using came out.
How to reset the BIOS
If for some reason you have made changes in the BIOS of the PC and you notice that the PC is going wrong, and you do not know what changes you have made or the default options, you can restart the BIOS. To do this, access the BIOS by pressing the run button, and when you access, look in the menus for the option to restart the BIOS.
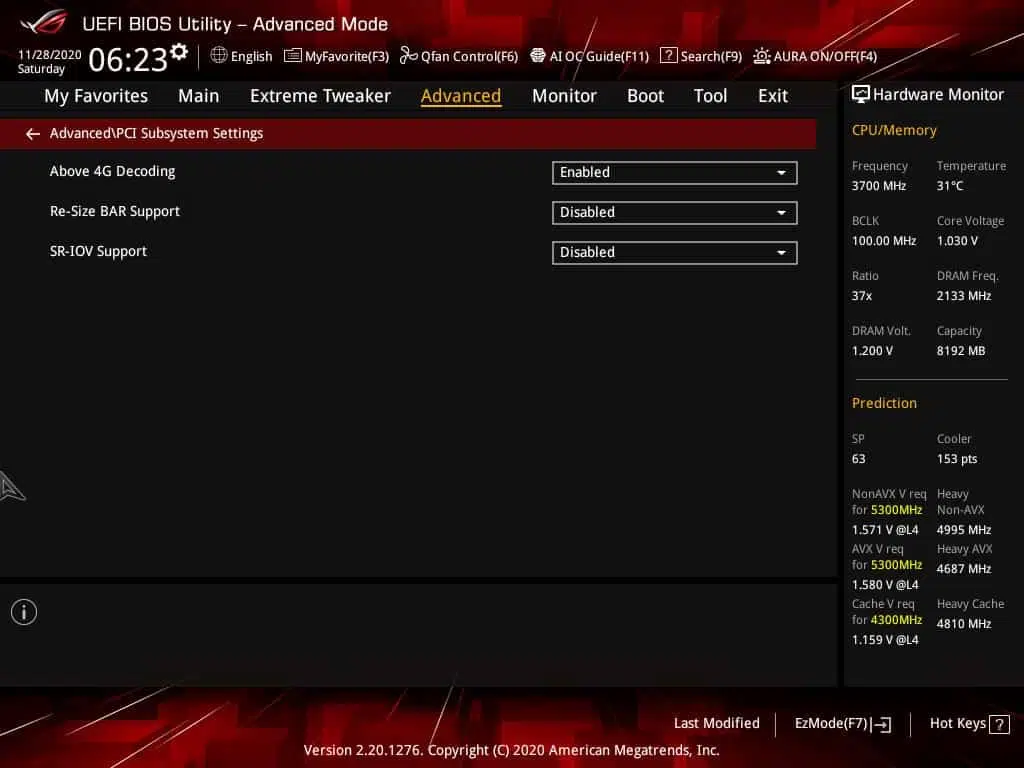
Accept if a confirmation menu appears, exit the BIOS and you will access the operating system. reboot and you will have the BIOS to factory settings. It does not mean that you will have the values as soon as you have taken the motherboard out of the box for installation, but that they are the values that the manufacturer sets by default.
How to access BIOS
To access the BIOS, a very common way is to restart the computer, and press the BIOS access key in the execution period. The BIOS access key can be seen quickly in the execution process, before the motherboard starts executing the operating system. You can also know the key to access the BIOS by consulting the manufacturer's manuals if you know what model of motherboard you have. If you don't know, you can access the Device Management tool and they will give you the business model.

Once you know it, you will be able to consult the information to be able to enter the BIOS of your PC.
Access the BIOS after turning on the PC
Create a shortcut by right-clicking on your desktop background on PC. In the properties of the shortcut you just created, enter the following.
shutdown /r /fw /t 1
You will be giving your PC the instruction to shutdown (shutdown), to reboot (/r), to access the firmware, in this case the BIOS (/fw), and to do so within a second (t, followed by the number of seconds to delay before the reset process, being 1 in this case).
Before executing it, in the properties you have to check the advanced options of the shortcut, which has to be executed with administrator permissions, otherwise it will not be effective.

What settings can I change in the BIOS?
- Change the order of the boot sequence
- Load factory settings
- Update the BIOS, in order to be up to date with security and compatibility patches.
- Create, change and deactivate the access password.
- Modify the date and time of the equipment.
- Change storage drive settings
- Modify optical drive settings
- View the amount of memory installed in the system
- Configure if we want the numeric pad of the keyboard to be active or not when starting up.
- Enable or disable the motherboard manufacturer's logo at boot.
- Activate or deactivate the Power On Self Test.
- Enable or disable the internal cache of the processor.
- Change the options and behavior of the renderer.
- Modify RAM memory options and speed, usually as overclocking or power consumption control options.
- change voltages
- Enable, customize, or disable ErP to distribute or not distribute power to devices connected to USB ports when the PC is turned off.
- Create RAID systems of storage devices, for when we have several storages.
- Enable or disable IEE1394
- Enable or disable the integrated sound card on the motherboard.
- Enable or disable the RS232/LPT ports.
- Enable or disable ACPI.
- Change the behavior of the PC power button.
- Modify boot options.
- Enabling or disabling various monitors at boot, such as choosing which storage to use for running the operating system, or the boot device.
- Change the behavior of PWM fans
- Monitor PC temperatures
How to turn off the keyboard or mouse lights to turn off the PC
One of the options that the BIOS gives you is what to do when you exit the operating system. One of them is to offer power to the devices through the USB connectors, and that is especially useful in a device in the living room that is used to charge mobile phones. But now that many people use personal computers in their rooms, usually with USB keyboards or mice, it happens that when you turn off a computer, the mouse lights stay on.
This is because even when turned off, the PC consumes a minuscule amount of power through the power supply to be ready to start. You can change some settings in the BIOS, looking for the option to activate or customize ErP or Deep Sleep, among other terminologies used by different motherboard manufacturers. Generally, ErP enabled causes electricity to no longer be distributed through the PC case USBs connected through the motherboard.
Physically reset the BIOS
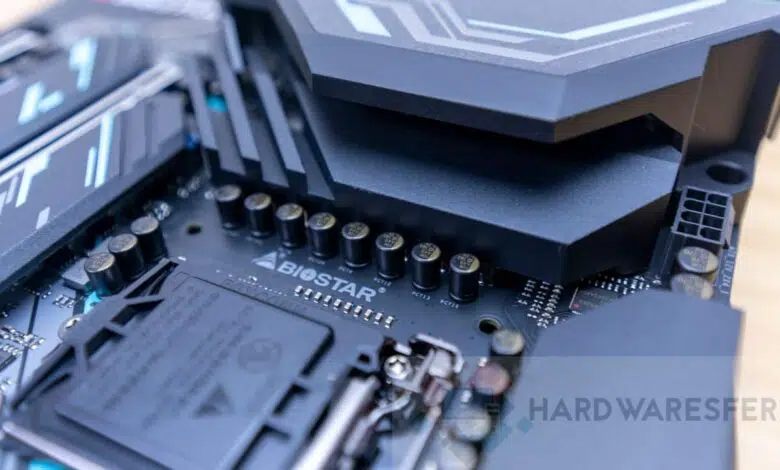
To do a BIOS reset to your motherboard physically, there are two ways you can do it. The first is by disconnecting and reconnecting the BIOS stack, which holds the motherboard's configuration data. This pile is usually in one of the corners, or in the center, but it is very easily visible.
We take a flat screwdriver, and press the BIOS battery ejector to remove it. Once removed, we wait about five minutes, because the capacitors may still have a certain charge, and we want it to discharge completely, hence we remove the battery. Once that time has passed, we simply reconnect the battery until it clicks, and we will have the BIOS of our motherboard restarted. It is possible that if you buy a laptop motherboard or a newer one, that the pile is soldered and you can't remove it, so this method is not possible.
The other is changing the jumper that is for the connectors with the acronym CLB. Once we locate this jumper, we remove it and change its position, from 1 to 2 or from 2 to 1. It is important that the middle pin is always connected. That is, the one on the left and the one in the center, or the one in the center and the one on the right, are connected. Before reconnecting the jumper, we should wait about five minutes to be sure that the BIOS reset has been done correctly by discharging the current before reintroducing the jumper.
It is important to know that before making any physical changes to the motherboard, we must disconnect it from the current, and activate the start button of the PC so that any electricity that may be in the capacitors is discharged. It is also advisable to take precautions and wear an antistatic wrist strap.
What is the use of physically resetting the BIOS?
Restarting the BIOS physically is useful when computers that you overclock, and due to a failure or crash, it doesn't even enter the BIOS.
Reset BIOS with a flash drive
In recent years, MSI, Gigabyte, Asus and other motherboard manufacturers have introduced the option to reset the BIOS with a dedicated button, and if we have a pen drive with a BIOS image connected to the USB.